Isn’t it funny how the weekends where you do next to nothing seem to wear you out more than the ones where you do everything? Is that just me? Anyway, it’s about time I start sharing with you our plans for our dining room. We’re planning on installing home made raised panel wainscoting. There are a few things I need to do first and I’ll explain below.
Here’s our current dining room:
We’re still rocking decorations from the birthday party… kinda works as a Valentine’s Day thing too though.
To get this party started, we’re going to have to remove all the chair rail and baseboard molding. The chair rail was added by the builder, so it’s not like I’m repeating the work I did here. I’m also thinking about trying to upgrade our baseboard molding when we re-install it after the paneling is done.
Our current baseboard molding is kinda short and I’m a fan of the taller stuff. To be consistent though, I’d probably want to start integrating this into the entire house. Definitely a chore, but it can be done room by room. Much easier going taller than shorter.
Another feature we’re going to want to add is another outlet behind this buffet. We have outlets on either side, but none directly behind it. We end up having to drape these cords out… This can absolutely be corrected. Depending upon where the current outlets meet up with our future paneling, we may have to move some outlets as well. Keeping our fingers crossed that we can avoid that.
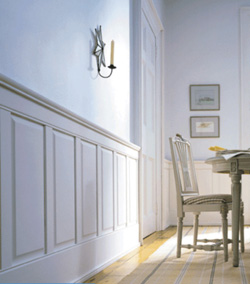
I started pinning (yes, John is pinning… but I’m not a regular) some raised panel ideas. We’ve yet to decide on the exact configuration of the paneling, although I’m leaning towards one specific design. I’ll spill the beans in a later post on that one. Here are some examples of what we’re thinking…

(Courtesy of New England Panel)
(Courtesy of Old Town Home)
If we could get a result that’s even close to that, we’d be thrilled!! So, here’s a list of what we’re going to have to accomplish and thus, what we’re going to be posting on:
1. Remove trim
2. Decide on layout and sketch on wall
3. Obligatory table saw post (What features to look for)
4. Move any outlets and add additional one
5. Build router table (Yes, I’m building one)
6. Install stiles and rails
7. Make and install MDF panels
8. Paint
So, stick around and watch our progress. Lisa still owes everyone a couple posts on the cake pops and her cupcake cookies too!! We plan on sprinkling in some Remodeling Older Home Strategy Posts as well. So, what projects are you starting?