After a fairly relaxing weekend with our wonderful moms and my beautiful wife, I was able to spend some free time on our dining room paneling project late Sunday afternoon. So far we’ve removed the old chair rail molding, added an outlet and repaired the wall damage from the wiring. Now we’re finally ready to start adding wood to our wall!! We’re going to kick it off with adding paneling under a window.
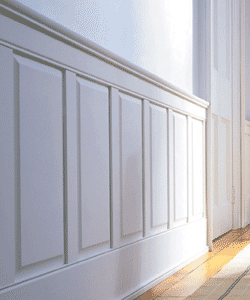
Last month we discussed some of our options for the overall look and layout of the paneling. We never filled you in on our decision. We decided to go with a combination of sorts. The wainscoting will have a high baseboard as opposed to the short baseboard molding throughout our house.
Kinda like this….
 And it will have a bolection molding and a sharp raised panel profile like this…
We picked these features for two reasons: it was the easiest to do in my opinion and Lisa and I both really liked the look of the added molding and the sharp lines. The downside is the applied bolection molding is an added cost and it had to be ordered and shipped to us. Oh well!! Still cheaper than paying someone to do it!
The construction method for this type of paneling isn’t too complicated and if I could find around 6-8 hours, I could probably finish the hardwood portion altogether. But, since I will be doing this project in dribs and drabs, it will take a while. The basic strategy is to install a hardwood frame, much like a cabinet door and then glue and nail them into the wall. The panel section is left open and an MDF center with a raised panel profile is added later. A piece of molding will bridge the hardwood to the MDF and tie it all together. If I lost you there, I promise that you’ll get it if you stick around.
The hardest part of this project is the planning. Deciding how wide, tall and how many panels on each wall to build is the hardest part. To help me out, I used A LOT of Microsoft Excel. I’ll also show you how to do that as well in another post.
Let’s get to the paneling… I started on the window wall. It’s actually the only wall I’ve got the frame up on.
I pre-assembled each frame section in the basement from poplar using pocket screws. Poplar is my choice du jour for any wood that will be painted. It’s a quality hardwood that doesn’t work very well for staining so it’s generally priced lower than cherry, oak or maple. The frame is resting on 1/2″ thick blocks until I nail it to the wall. I’m lifting it to give me some height on the wall. I was afraid it might be a tad too short, so better safe than sorry.
Here’s a less than sharp photo of the first section. You can see how the top and the bottom pieces run the width of the section and the sides run between them. I only had to add pocket screws from the sides into the top and bottom.
The other side of the window got the same treatment.
For the middle area under the window, we took a slightly different approach. We bumped out the wall by 3/4″ then added our panel. This will give that wall some more interest. First I glued and nailed a couple filler pieces.
Then I built the panel section…
Since this middle piece will be sticking out from the wall, I wanted to make sure the sides looked sharp. Normally, in carpentry projects, you try to avoid having any end grain showing. The top and the bottom pieces of this section have end grain showing that can be better dressed. To take care of that end grain, I mitered the ends of the panel section to a 45 degree angle. I did this to the individual pieces before I assembled it.
Then I added a long piece cut at the same angle.
That little angle piece isn’t perfect, but it should look great when it’s caulked and painted!
Once the center section was added, I was done with this wall until I go back and add the MDF center, which won’t be for a couple more weeks!!
Oh, and I’ll have to replace that window sill, since i ripped it out too! I’m definitely planning on showing a complete panel build from start to finish too.
Anyone else taking their sweet time with a project??