Hey everybody! Hope you all had a great weekend! We made major progress on our built-ins. The bottom cabinet is fully assembled and I’ll be working the top cabinet early this week. To recap, last week we knocked out the doors and test fit them into the face frame. This week’s post will start with planning and cutting the plywood and will hopefully wrap up with the assembly.
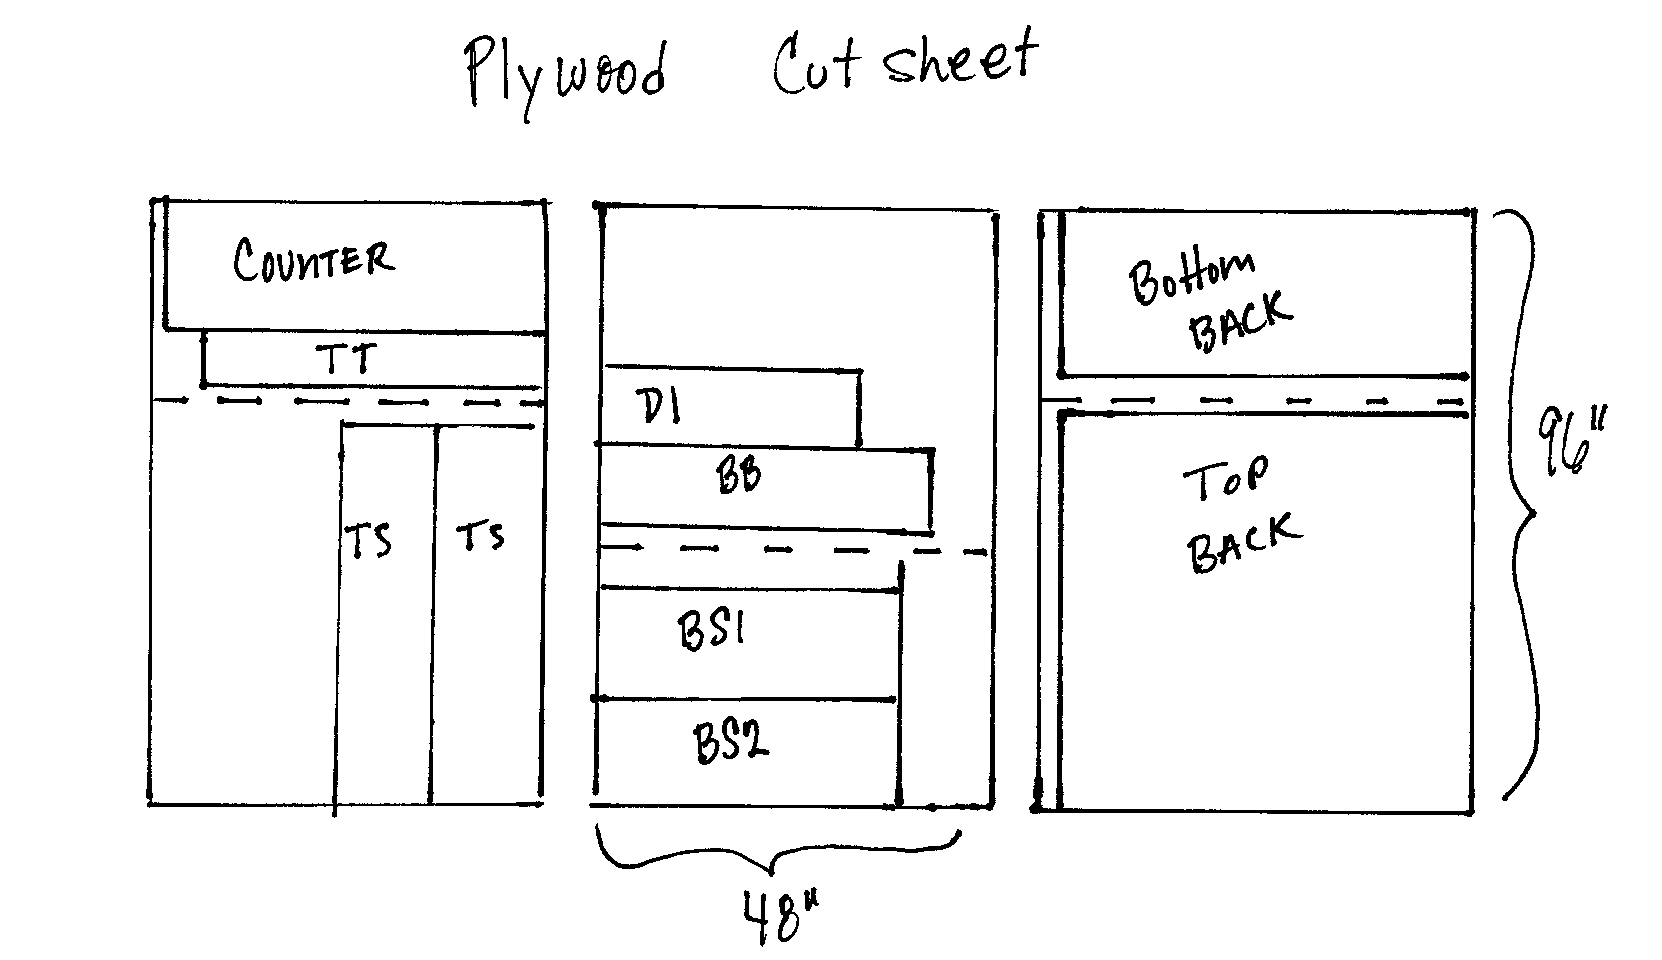
With the face frames and doors finished, it’s time to shift from pocket screws and poplar to plywood, grooves and dados. The plywood is the “box” portion of the cabinet. Since this project is going to be painted, I selected a quality paint grade plywood, in this case birch. Each 3/4″ thick plywood sheet is 4 feet wide by 8 feet long and costs about $49 a piece. I bought three of them. If this were a stain grade project, I would’ve bought a plywood product with an oak or maple veneer and they’re about $50 as well.
To properly size and plan the plywood portion of the project, I need to know how each piece will fit together. There are a number of ways to join plywood, including pocket screws, but I’m using grooves and dados. Grooves and dados are essentially the same thing. A groove is a notch that runs the length of a board and a dado is one that runs across it. You can make these cuts with either a table saw equipped with a dado blade or at router table. I used a table saw for this project. Frankly, I think table saws are a little easier to use.
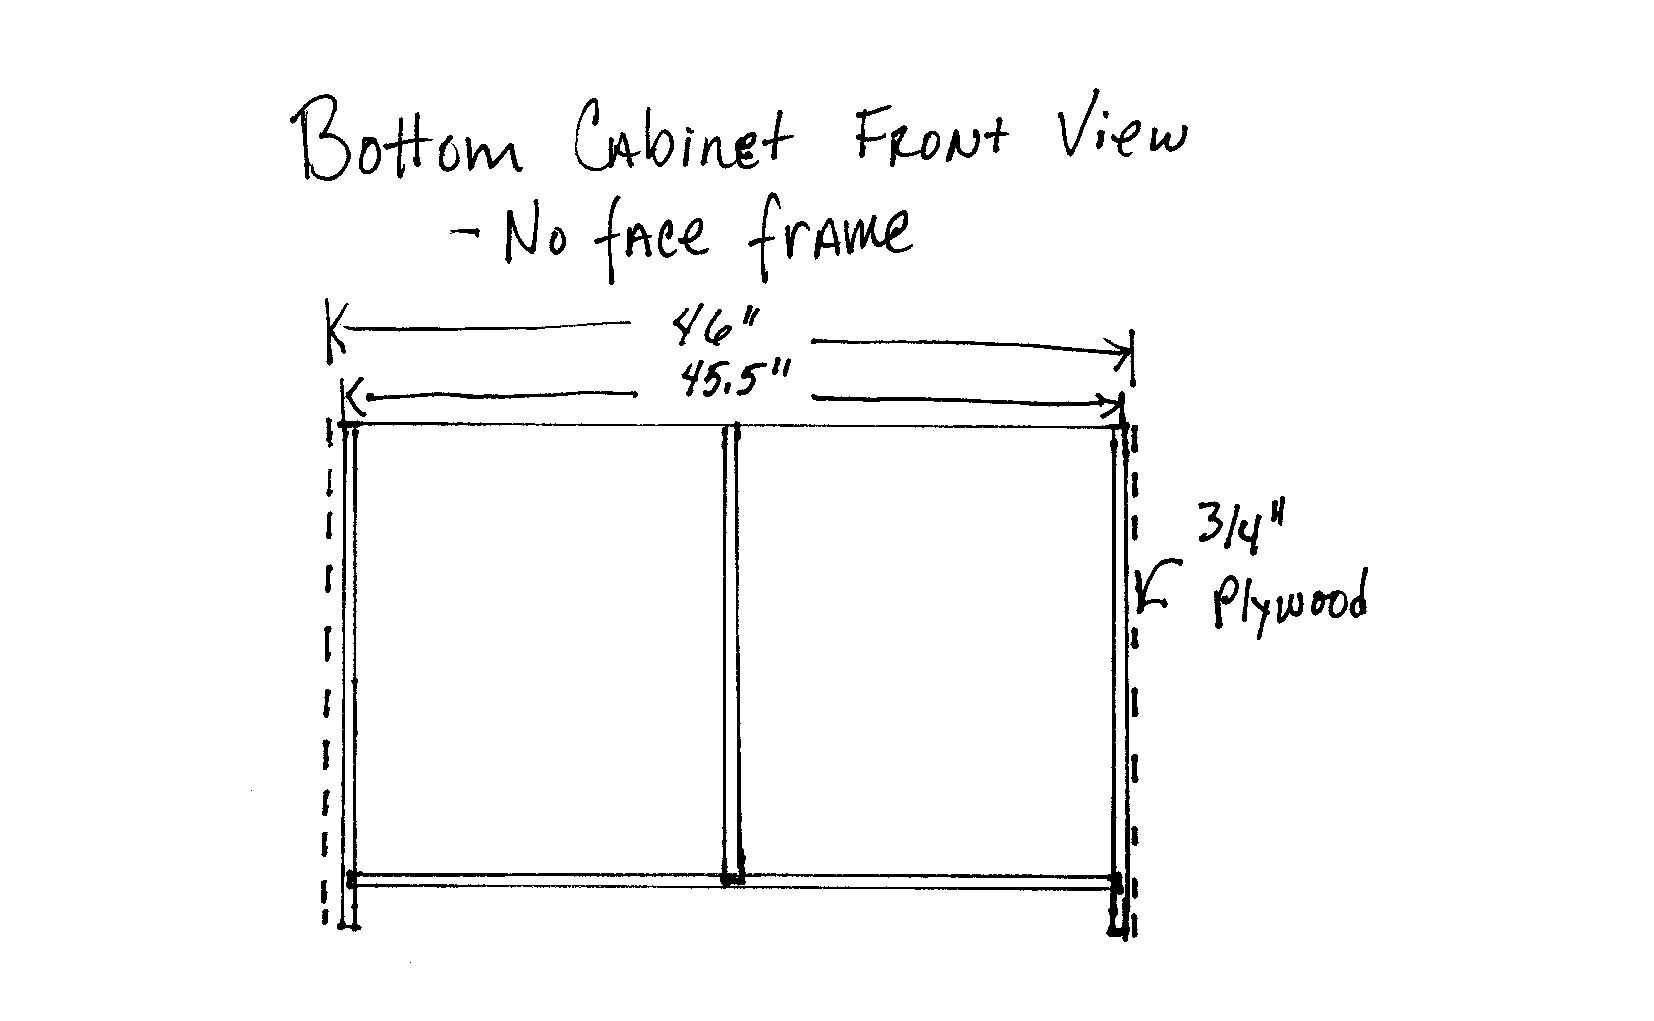
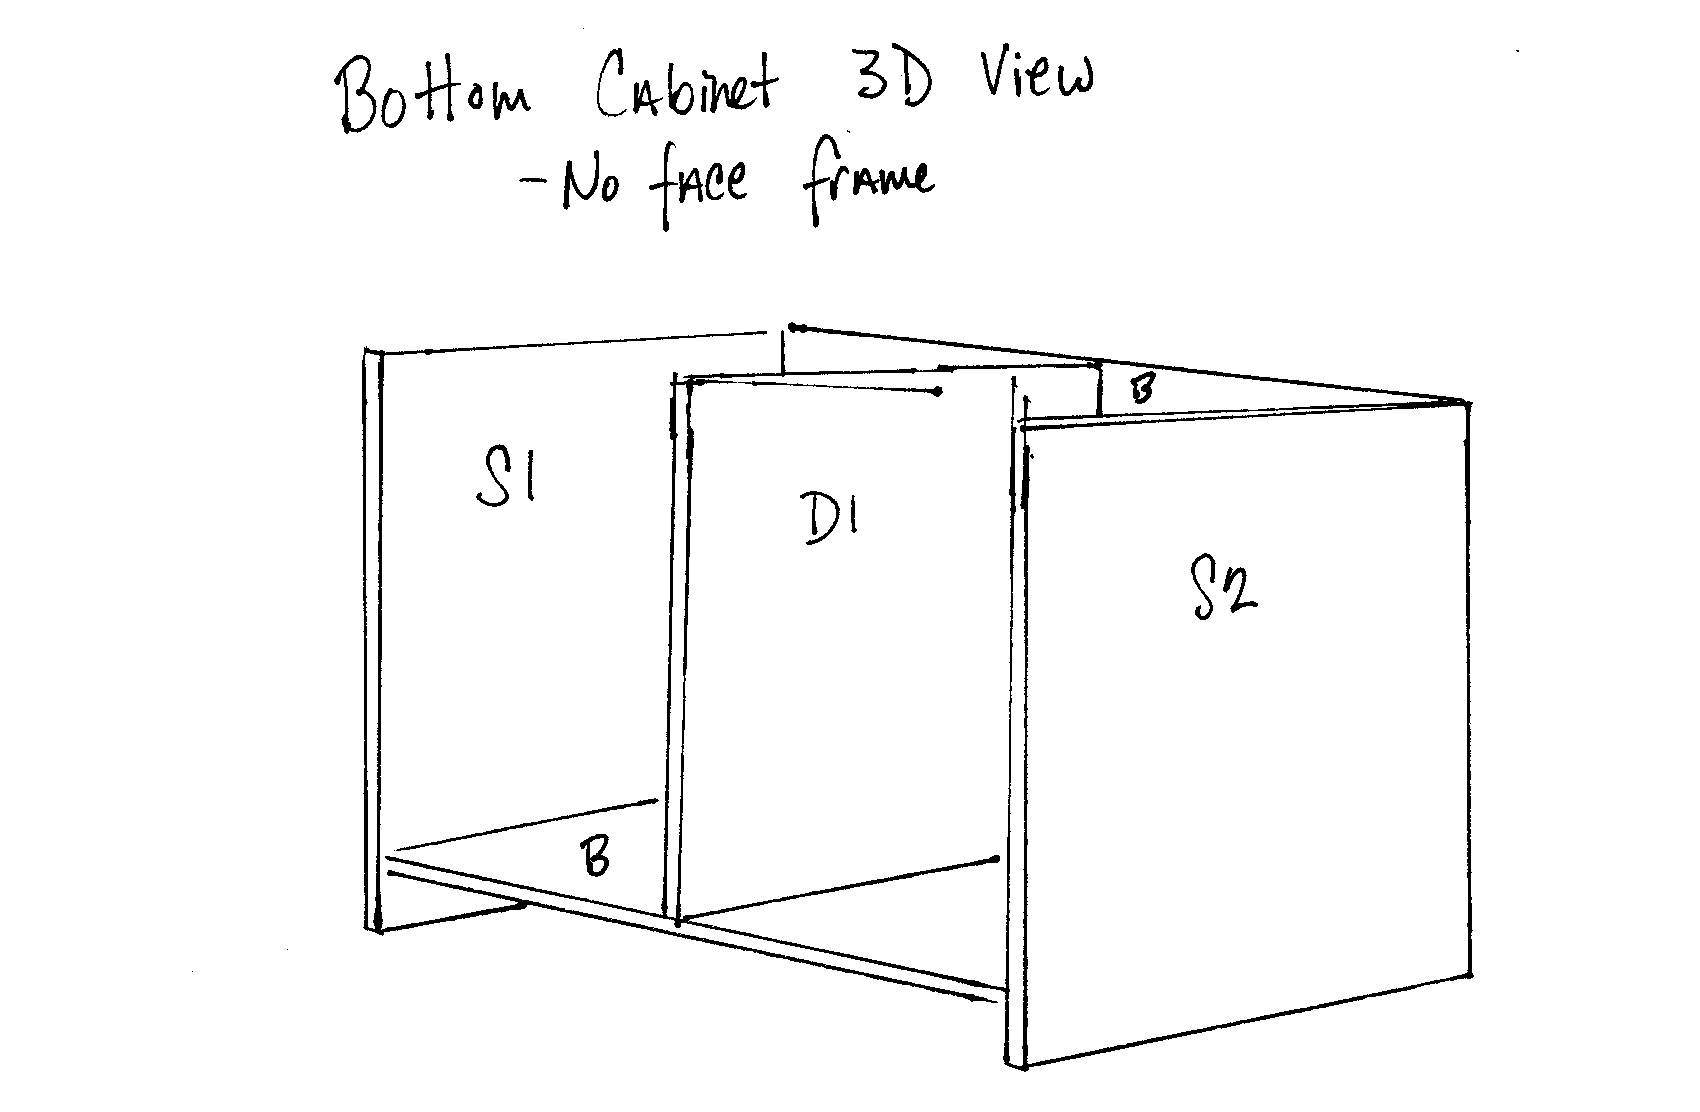
To aid with planning, I drew a number of quick sketches of various views of the cabinets, i.e., a top view, a side view, a 3D view, etc. Then I dimensioned each piece being careful to adhere to my overall project dimensions. Just so you know, the box portion is as tall as the face frame, but about 1/4″ narrower on each side. The tricky part to planning here is taking into account the grooves. Since I’m working with 3/4″ thick plywood, all my grooves are half way into that thickness, 3/8″. So for example, my bottom cabinet is 44″ wide (inside to inside) and the bottom shelf will connect those two, but instead of it being 44″ long, it’s 44 3/4″ since it sits in a 3/8″ wide groove on each side. I’ll show some pictures of the grooves and how it’s assembled in our next post.
After each piece is dimensioned, I come up with a parts list by cabinet:
Bottom Cabinet:
2 @ 34.25″ x 17.25″ Side 1, Side 2 (BS1, BS2)
1 @ 34.25″ x 44.75″ Bottom Back
1 @ 16.375″ x 44.75″ Bottom (BB)
1 @ 16.375″ x 28.875″ Divider (D1)
Countertop:
1 @ 47.25″ x 18.25″ Counter
Top Cabinet:
2 @ 11.25″ x 57.375″ Sides (TS)
1 @ 57.375″ x 44.75″ Top Back
1 @ 10.375″ x 44.75″ Top (TT)
Then I take those parts and try to see how many 4×8 sheets of plywood I’ll need. To do that, I just draw each part onto a rectangle and book keep how much room I have left. These are plywood cutsheets. These sheets don’t have to be drawn to scale, just keep track of how many inches each piece takes up. The goal is to buy as few sheets as required. I also drew a dashed line to indicate where I can have the sheet cut at Lowes on the panel saw. Since my Jeep is gone, I rented the Lowes truck for an hour, but having them cut into two pieces makes carrying it into the house much easier. I managed to borrow a neighbor to help me with that too. Thanks Mike!
With the sheets in the house and all the pieces identified dimensionally, I just cut them all to size using my table saw for most of the cuts and a hand held circular saw for the rest.
Once they’re all cut, I can machine the grooves and dados. I’ll show you what the pieces look like with those grooves in our next post.
Anyone else looking forward to spring? Get any projects done this weekend?


