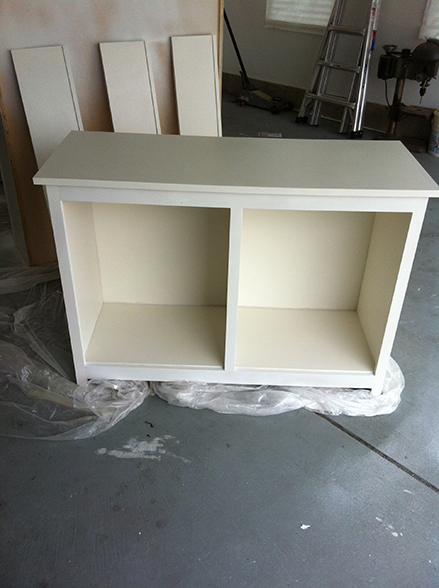
Happy Tuesday! Sure beats Happy Monday, am I right? We are just moments away from wrapping up our built-in project. All the cabinet work has been primed and painted, I just need to add a second coat to some areas. I don’t know if I’ve ever shared the basic process I follow when I sand and paint furniture. I have a habit of repeating myself, which Lisa loves to gently remind of me from time to time. So, if you know how to sand and paint furniture, just skim the photos and stop by later to see the finished built-in.
Sanding and Painting Unfinished Furniture
I start with my random orbital sander (ROS). I picked this sander up last year when we were working on our sliding drawer project. It was relatively inexpensive and works great. ROSs are the most versatile of the electric sanders and work well with most projects. The other options are the vibrating pad or reciprocating sanders and the belt sanders. The reciprocating sanders aren’t bad either, but they only shake in one direction so they require more work on your part to use them effectively. Belt sanders are better for bigger more aggressive sanding work and should probably be skipped for regular woodworking projects. ROSs are the Goldilocks of sanders.
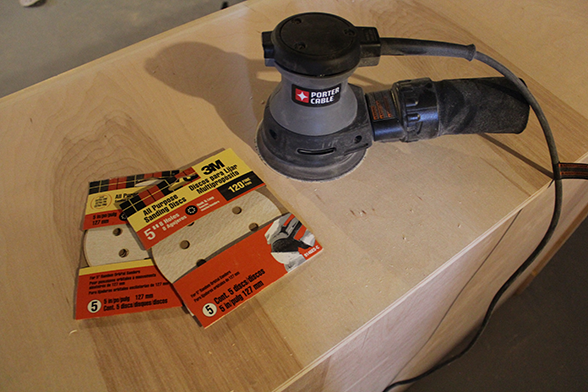
The sand paper for the ROS comes as a disc with either an adhesive or velco backing, which makes swapping them out a quick process. For most woodworking projects, if I have wood that is in good shape and doesn’t have any gouges or scratches in it, I use a 120 grit paper. The 120 is abrasive enough to take down sharp edges, but gentle enough that it won’t majorly scratch your work. If I need to remove a lot of material or repair deep scratches I’ll start with a 40 or 60 grit paper. The lower the number, the more abrasive the paper.
After I’ve sanded all the visible surfaces with the 120, I switch to a 220 grit paper and repeat the process. Since this is a paint grade project, that’s as far as I’ll go. Some higher quality or stain grade projects may require a 330 grit paper to polish the wood further. While sanding I also make sure to take the sharp edges off all the corners. A knocked down edge will hole the paint or stain much better than a sharp edge. Plus, it feels better on your hand.
You know you’re done sanding when the project feels baby soft to the touch. To prep the piece for painting, use either a compressed air source to blow the work clean or shake it and wipe it down.
For the painting process, I start with a spray primer. I’m a stickler for this part of the painting process. Most paint grade projects I work on will get about four coats of paint, 2 of primer and 2 of the finish coat. I try to spray the first two coats of primer. The reason being, brushes and rollers leave marks, however well executed and subtle. Spray paint leaves a near perfect finish. So, it’s better to have a smooth base and some brush marks on the last couple coats than four coats of brush marks. Get it?
If you don’t have a spray system with an HVLP gun like we used on our wainscoting project, you can use a regular can of spray paint/primer. I used a few cans of Valspar primer from Lowes for this project after my HVLP spray paint ran out. The more coats of spray paint you use, the smoother your result will be. To get that Ikea-like candy coating, if that’s what you’re after, use the spray primer followed by several coats of spray lacquer including a few clear coats of lacquer. Be sure to sand lightly with a 330 grit or higher paper or steel wool in between coats.
Since this project is a built-in, we want it to match our baseboard molding and look like it’s part of the wall. To get that look, we’re following the primer with a couple coats of regular semi-gloss latex trim paint from Sherwin Williams (Shell White). Regular latex paint is not ideal for book cases or anything where you’ll have inanimate objects sitting on it for long periods of time. Reason being, the latex will get stuck to whatever you rest on it eventually and peel off. Ideally, we should use a high quality furniture paint that resists that sort of sticking, which is called “blocking”. You want a paint with good “blocking” resistance. Enamels and lacquers are great for that feature, latex paint not so much. So why are we using it? Well, as I mentioned, we want the built-in to match the house trim, so that’s what we’re stuck with. I’m hoping the primer we used will help prevent some of that sticking nastiness. Time will tell.
What’s a good product for furniture painting that resists blocking? We used Benjamin Moore’s Satin Impervo on the kitchen cabinets from our first home and we loved how it came out. Ask around though. Professional painters seem to have some strong opinions on their favorite products.
So that’s my two cents on sanding and painting. Hope you got something out of it.
Baby #2 is not here yet, either just in case you were wondering. Anyone else suffering through some painting projects at the moment?


