Hope everyone had an enjoyable and restful weekend! Last week we started the design work on our custom media cabinet by constraining our overall dimensions and making a rough drawing of how it should look. Today, we’re going to pickup where we left off and do some detailed design work starting with the face frames.
Even though this is a custom piece, it has the same basic bones as your typical run of the mill kitchen cabinet. It consists of a plywood box, a hardwood face frame, a countertop and of course, some doors.
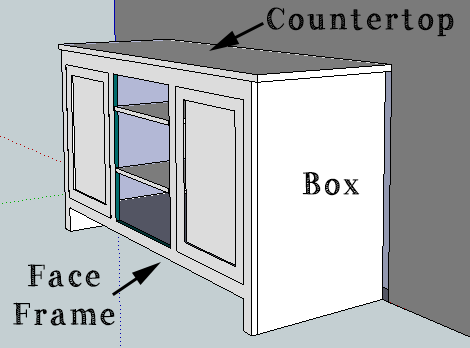
If you’re not familiar with what a face frame is, go take a look at your kitchen cabinets. Most American kitchen cabinets have face frames. It’s a 3/4″ thick frame of wood that gets attached to the plywood box portion of the cabinet. Here’s a side view of the media cabinet we’re designing that shows that the frame and the box. A lot of European cabinets are “frameless” and skip the face frame altogether. Ikea kitchen cabinets are frameless. Some of this may sound familiar if you followed our built-in posts closely.
The face frame does a few things for us: it provides a frame to attach the doors to, it serves as a divider between each section and it provides some added strength to our media cabinet. It also gives the cabinet a more traditional look.
So let’s take a closer look at our face frame.
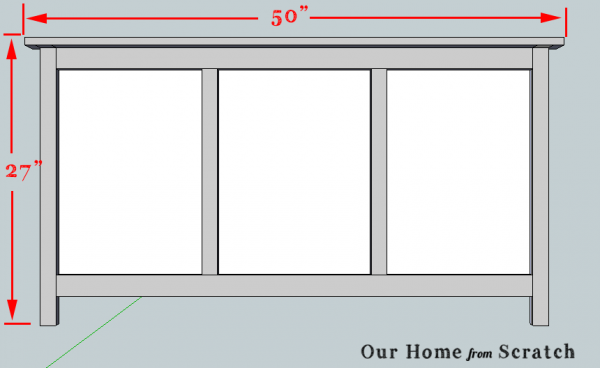
In our last post we mentioned that the overall height of the cabinet it 27″ and the width is 50″. From the image above, you can tell that those dimensions INCLUDE the countertop. That’s important because I think the countertop will look great if it overhangs the rest of the cabinet by a good inch on the front and both sides. The countertop will also be 3/4″ thick.
So let’s subtract out the 3/4″ countertop thickness and the 1″ overhang on both sides and see where that leaves us.
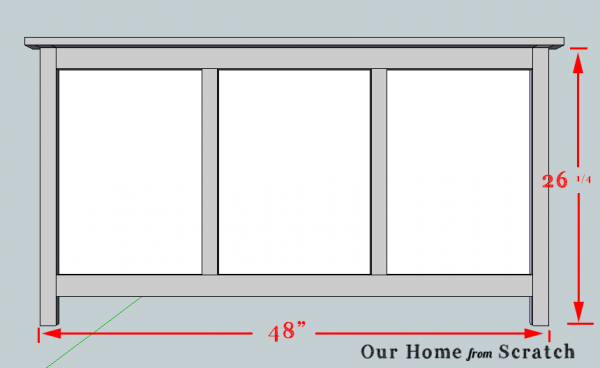
Now we know the overall dimensions of the face frame. Not too hard, right?
We’re almost ready to dimension each of the face frame pieces, but before we can do that we need to make a couple decisions. We need to pick the width of each board that’s going into the frame. In order to do that, we need to know where each board ends and the next one begins. To help make this step easier, I color and letter coded the face frame drawing. Each color and letter is a different board. The same color and letter boards are the same dimensions exactly.
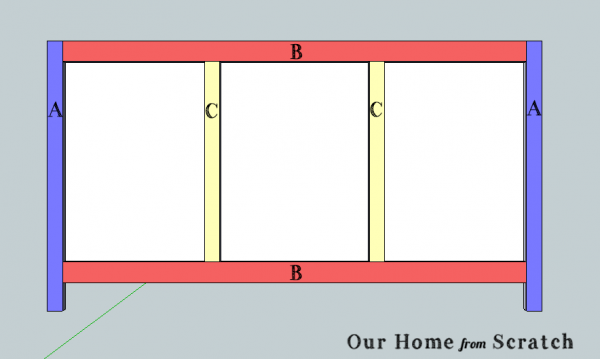
When I designed my built-in cabinet, I made most of the face frame out of 1.5″ wide boards (also known as 1″ x 2’s” or “one by’s”). A “one by two” is a 3/4″ thick board that’s 1.5″ wide. Why they don’t call it a 3/4″ by 1.5″ is beyond me.
Let’s take each board and dimension it.
The “A” boards
The”A” boards will be 1.5″ wide as we mentioned. The length is 27″ minus the thickness of the countertop: 26 1/4″.
The “B” boards
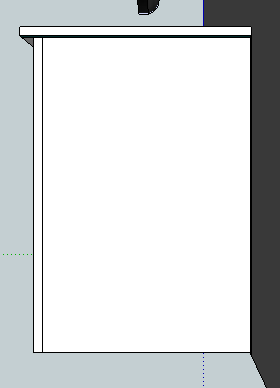
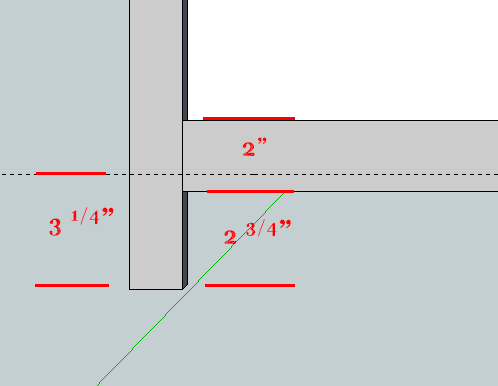
The bottom “B” board will have part of its width covered by a baseboard trim. I’d like 1/2″ to be hidden behind that baseboard molding and above the baseboard I’d like to have 1.5″ to be visible. So that’s a 2″ wide board. The length is 48″ minus the width of the two “A” boards, leaving 45″. The top “B” board won’t be hidden at all, but I’m going to make it 2″ wide anyway. I think the top board will look better if it’s a little wider than the rest.
The image below shows a close up of the bottom “B” board and how it will be partly covered by my baseboard molding. The dashed line represents the top of the baseboard molding, which is 3 1/4″ tall.
The “C” boards
The “C” boards will be 1.5″ wide. The length is determined from subtracting out both “B” boards and the 2 3/4″ bottom space from the overall 26 1/4″ length of the face frame leaving 19 1/2″.
Let’s recap our dimensions, all are 3/4″ thick:
A: 1.5″ wide x 26 1/4″ long
B: 2″ wide x 45″ long
C: 1.5″ wide x 19 1/2″ long
Now that we have the dimensions for all of our face frame components, we can move onto the next step, which will be to design and dimension our cabinet box. We’ll save that for our next post.
What can you takeaway from this post?
Face frames sit on the front of most American cabinets. You can design a face frame from the overall dimensions of a project and you can dimension each board if you select board widths. This stuff isn’t rocket science, it’s basic math and some design choices. It’s just a matter of knowing the process.
Any questions?


