In this post, you’ll learn
– How to use chalk lines to mark for center
– How a compass and a drywall saw are used for ceiling light holes
Late last week, I got a call from our local township that our electrical permit was approved. Right after I picked it up, I got started. When I last left off, the coffered ceiling was all framed out. We decided to go with four lights in the room: three in the center section and one over where the desk will be located. Let me start by showing you how I marked and cut the locations for the lights, since it’s a fairly useful trick to learn.
Wiring for the Office Lights
The three lights that would be in the coffered ceiling section of the office would be centered in the middle of a few of those ceiling squares. To make marking the center of the squares easier, I snapped a chalk line from opposing corners.

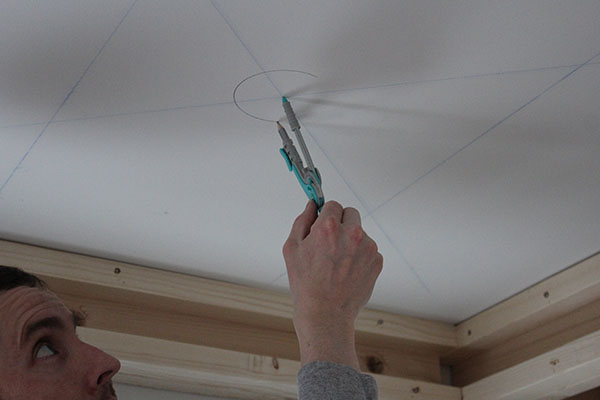
Where the two lines intersected is the center of the box. Next, I used a compass and drew a circle 4″ in diameter, which is what was required for the lighting fixtures we bought.
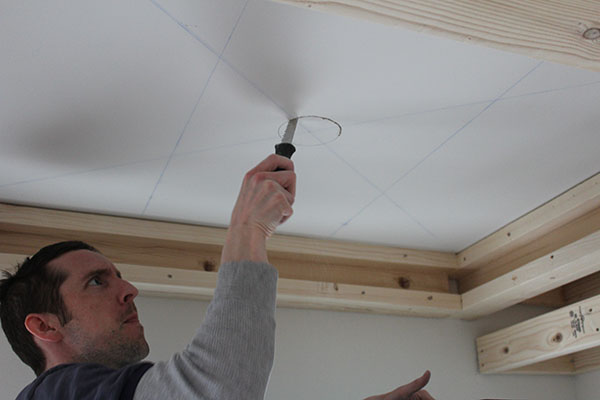
After the circle was drawn out, I used a hand held drywall saw to cut the hole out.
With all the holes cut out in the ceiling, I proceeded to run some Romex cable in the tracks created by the coffered ceiling I-beams to each hole location. As required by code, I also stapled the cables to the structure every few feet. Later on, before the rough-in inspection, I’ll fill in those holes in the framing with fire block foam.
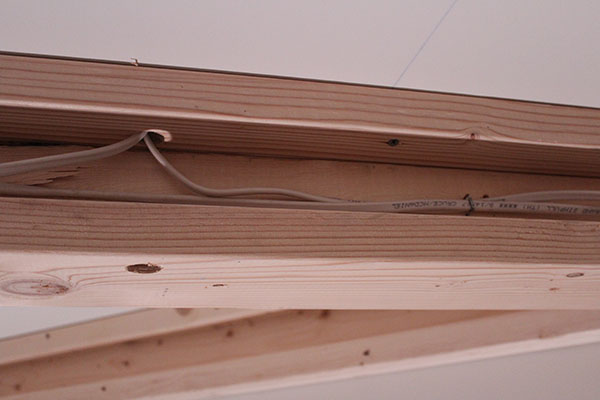
Just to give you a little more details on the wiring… I used 14-2 sized Romex. That means it’s 14 gauge wire with 2 conductors. 14 gauge is used for 15 amp circuits and therefore needs to be tied into a 15 amp breaker. This lighting is going on it’s own circuit, which is created when I add a new breaker in the breaker box. The breaker box I own is a Square D brand box and the 15 amp breaker I buy needs to be a Square D breaker in order to install properly. It’s kind of a waste to be adding an entire circuit just for four lights, so I’ll probably tie in additional basement lights into this same circuit whenever we get around to finishing the basement.
As I mentioned, the office will have four lights, with three being controlled by one switch and the fourth light getting its own dedicated switch. I’m locating those switches in a place where I previously had a switched outlet for the office. I’m removing the switched outlet setup and just adding these two new switches for the overhead light.
Because I’m adding this coffered ceiling framing, it made running the wires to these lights considerably easier than if I didn’t have the framing. Without the framing, the wires would need to come up inside the walls and into the joist space. To pull that wire through, I’d have to cut holes in the drywall and the ceiling in multiple locations. Overall, it’s be easier NOT to do the coffered ceiling, but since I’m already doing it, the wiring is made easier.
At this point, I’m ready for my rough-in inspection. Once the inspector passes the work, I’ll be given the go-ahead to start drywalling the bare wood. He won’t need to come back until the room is completely finished.
This isn’t the first time I used a chalk line to help me with my electrical work. I also used in when we installed an additional outlet in the dining room. If you’re interested in how I ran cables, definitely check that post out as it goes into more depth than this post.
Thanks for reading. If you enjoyed this post, please share it.


