In today’s post you’ll learn:
– How to Scribe a Cabinet
In an ideal world, all walls and floors would be square and true (and all mortgages paid off). Since that never seems to be the case, you need to know how to modify your cabinets or built-ins to account for uneven walls. If you want a professional look to your work, this is a must read. Luckily, this process is fairly simple and only requires a circular saw and one of those compasses you used in grade school art class. Whoever thought you’d need one of those again?
Let’s start with reality. Here’s one of our home office cabinets pushed tight into the corner.
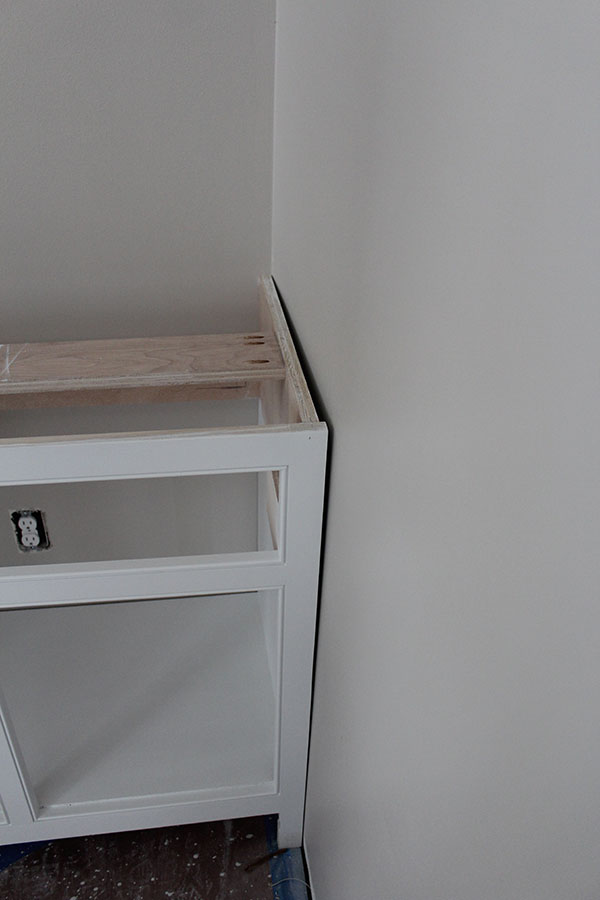
You can see it’s tight against the bottom of the cabinet, but open along the top. No bueno. Could you caulk that seam? Sure you could. I actually plan on caulking it. However, you shouldn’t caulk anything wider than 1/4″ or it will look sloppy. That opening at the top is around 5/16″ wide so it’s much too wide for caulk.
Here’s what we’ll do to fix it.
First, we’ll take a look at the top of the cabinet to see what kind of overhang I have on the face frame.
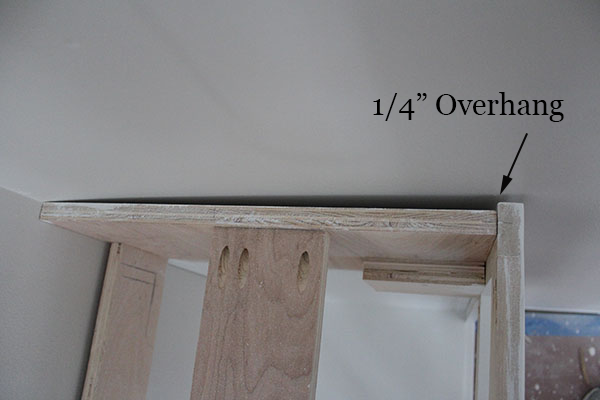
In this photo you can see that the face frame overhangs the side of the cabinet by about 1/4″. If I was smart and better prepared, I would’ve designed in a larger overhang, say 3/8″, to allow for scribing as-is. Alas, I only gave myself around 1/4″ (probably closer to 3/16″).
Since I don’t have enough “meat” overhanging the side, I’ll just add some more wood and make it work.
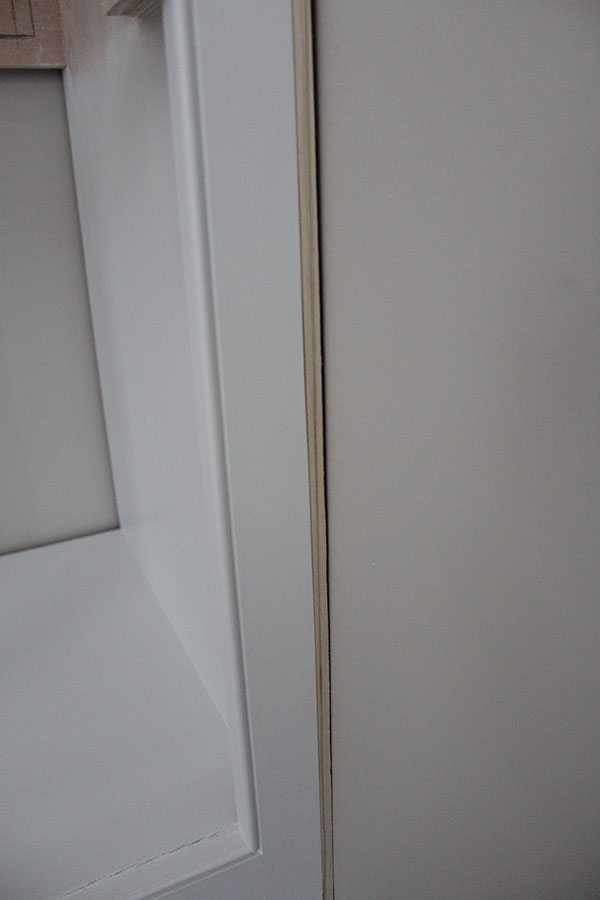
I start by measuring the gap between the edge of face frame and the wall. It’s about 5/16″. I then cut a strip of wood 5/16″ wide and I glue and nail it to the side of the cabinet.
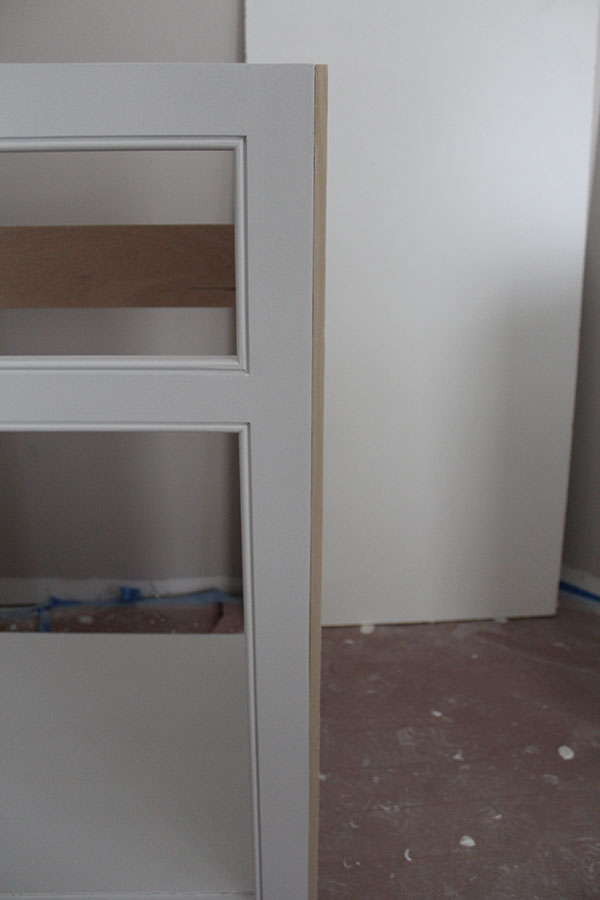
Now I have plenty of overhang on that side of the cabinet.
Next, I shove the cabinet back in the corner. The gap will be identical before I tacked on the wood strip, since the wall is still curving away from the cabinet.
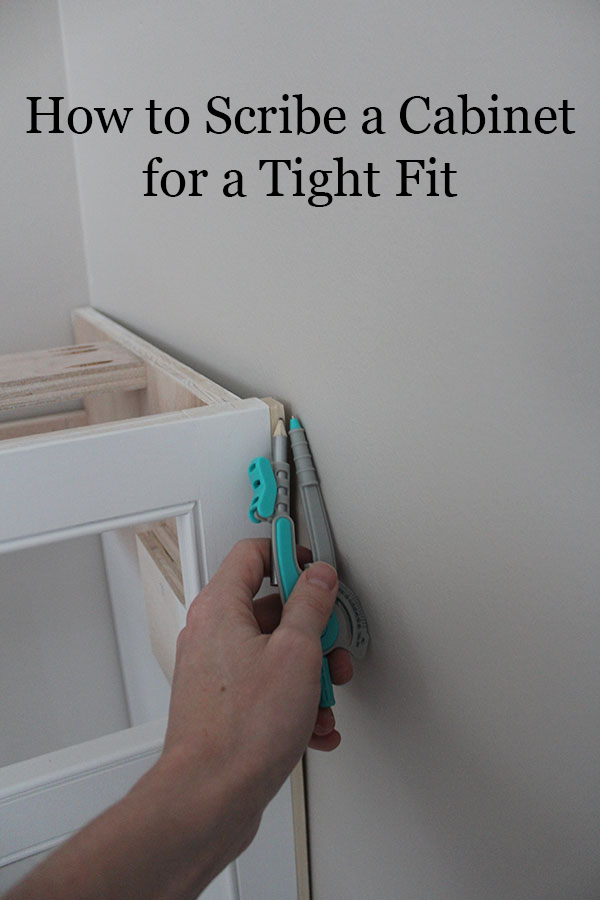
Now I take my compass and I set the distance between the needle and the pencil to the same distance as the gap between the cabinet and the wall.
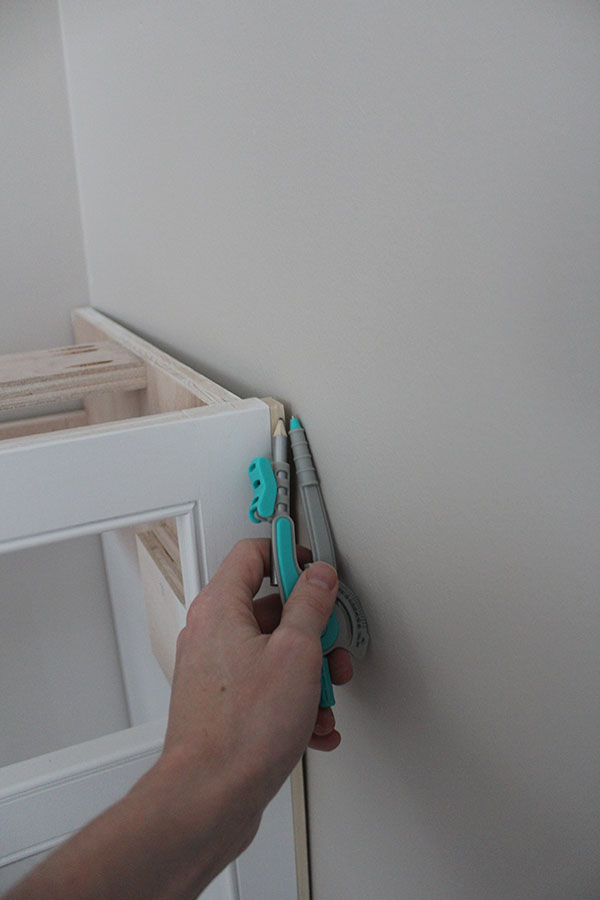
Then I just run the compass down the curve of the wall with the pencil on the cabinet. The compass will mark out a line on the cabinet that matches the curvature of the wall.
The last part is easy. Just take your circular saw and cut along the line. You’ll be removing material from the strip so it will then match the wall.
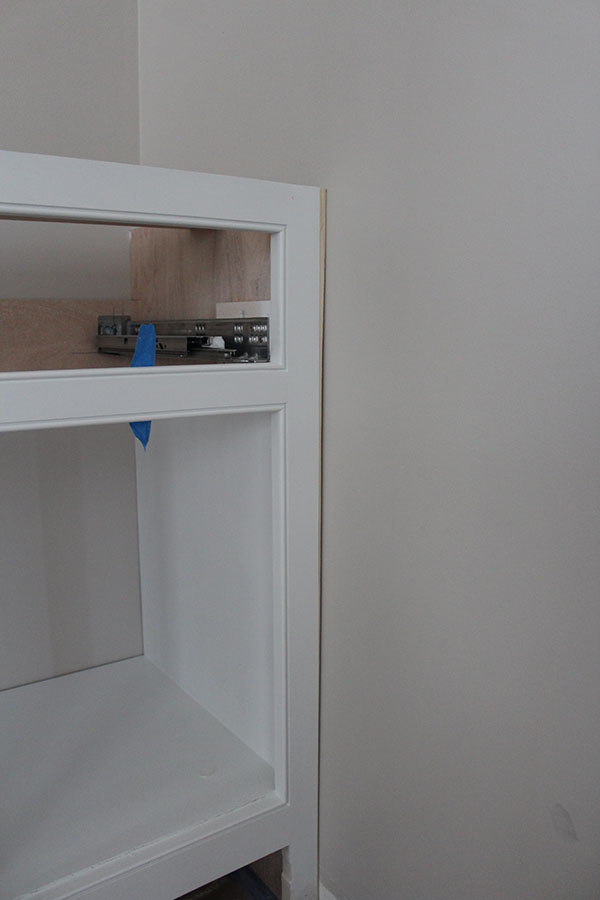
After the cut has been made, the cabinet gets shoved back into the corner and we can see that the gap is pretty much gone. Any open seam can be filled in with a much smaller amount of painter’s caulk.
To finish the project, I’ll just make sure I fill in any gap between the wood strip and the cabinet with wood putty and I’ll sand and paint it.
I’ll have to repeat this process for the top cabinet that sits above this lower unit.
If you can’t tell, I’m intentionally trying to keep the reveal of this project as hush hush as possible. Thus, the lack of pictures of all the cabinets.
Now that you know how to scribe, do you think you’ll use this trick?
P. S. I also had to use this technique for my raised panel wainscoting.


