In this post, you’ll learn:
– a simple method for installing cabinet hardware
It seems that the closer I get to finishing this home office project, more small tasks keep popping up and they’re taking much longer than I anticipated. Case in point: the cabinet hardware. It took me a good two and a half hours to get two cabinets done. Killer. Still have to add the hardware to the filing cabinet. At this rate, our office should be completely done by the time our 3 year old heads to college.
Let’s talk cabinet hardware for a second. Lisa picked our gear out. I was completely hands off on this one, although I let her know which ones I definitely didn’t like. It’s pretty much the exact same conversation we have when we’re trying to pick a restaurant for dinner, except slightly more expensive. Although.. you can return hardware if you don’t like it even after you’ve taken it home. Can’t do that at a restaurant.
We were originally thinking some shell pulls, but we didn’t see any we liked. We ended up with a basic 3.5″ nickel pull from Lowes. Instead of using a jig for this job, like the one I made for our Large Built-in cabinet, I went old-school and just drew some lines and drilled some holes. Not quite as fast, but just as effective. Here’s how it went.
How to Install Cabinet Hardware without a Jig
Here’s the cabinet before we got started.
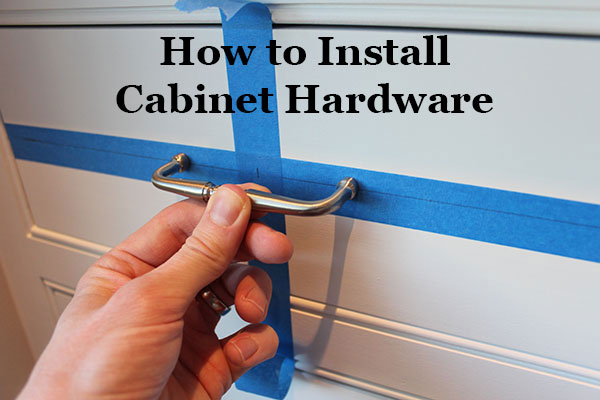
I started by applying some blue painters tape across the drawer front. I roughly aimed for the middle, but it wasn’t terribly important at this point. Once the tape was on, I measured down from the top of the drawer edge to the middle of the drawer front. I did that on both sides of the drawer front and used a straight edge to connect the dots. I now had a straight line across the drawer front that marked the center line.
I also applied some painters tape vertically to coincide with the center of the doors below. I marked those vertical tape pieces at the same dimension as half the width of the door.
Now I was ready to use my hardware for the next step.
I lined up the hardware on the center line of the drawer front and positioned it over the mark for the door centers. That way the screw holes will both be in the same line and the middle of the piece will be directly over the middle of the door. If this sounds confusing, just take a look at the pictures, it’s a bit cumbersome to describe.
While I was holding the hardware in place, I traced around the hardware where it sat against the drawer front.
Now I had my drill marks.
The first hole I drilled was a small pilot hole just to get through the drawer. I then went up to a drill bit diameter that was slightly larger than the screw for the drawer pull. I repeated this same basic process for the door pulls. Just tape it, draw a center line and then position it where you want it. Drill twice and you’re done. The painters tape helps keep the wood from tearing and you can draw right on it without having to worry about touching up your cabinet’s paint job.
We were originally going to go with just one pull on the drawer fronts, but I think it looks more substantial with the two.
Here’s what’s left for this room:
1. Paint the new baseboards, window sills and inside of the door.
2. Install quarter round trim
3. Clean up and touch up
4. New window shades
5. Drill some access holes for computer power cord, printer cable, etc.
6. Finish decor and wall hangings
Oh and I’m also repairing a few nail pops, because you know… I didn’t have enough to do in here already.
Later this week I’m going to be starting to configure our new forum section. Keep your fingers crossed! Hoping to setup an area on our site where everyone can share their own projects, show off their results and ask for help with home projects! I’ve also commissioned a new blog theme, so our look is going to dramatically change. Hoping to get that in place before the holidays. I won’t be coding it myself this time, so it should go fairly quick. We have some big, big changes headed your way over the next few months… if this office doesn’t kill me first.