In this post, you’ll learn:
– How to configure a cabinet for installation and counters
– How do get a deep, rich stain
Well, we’re down to the wire in our home office project. Officially, all I have left to do is add some trim beneath the crown molding, install the baseboard trim and do some painting. Keeping my fingers crossed that I’ll be done everything by the end of next week. Then it’s just setup and decorating. So thrilled to wrapping this room up.
I’ve got a bunch of new videos coming your way soon. Hopefully later this week I’ll be publishing my second video on Inset Cabinet Doors. May actually put together a third door film at some point. I’m going to release a video on building the built-in cabinets, so you get a more continuous perspective on the work. I also owe you more videos on my workshop tools, including the miter saw and the jointer. Thanks for your patience on those!
Now let’s talk about some features I added to my cabinets to both make them easier to install AND easier to top with counters.
Here’s a top view of the inside of the base cabinets.
Couple things worth pointing out. There is a plywood brace on top that spans from one side of the box to the other. It’s secured in place with a couple of pocket screws. There’s also a second brace along the back. That’s also a plywood piece that supports the drawer slides and gives me something to secure the cabinet to wall.
Let’s take a look at how I install the cabinet to the wall using the back brace.
First I use a studfinder and mark the walls. Since my brace is set back into the cabinet by a 1/4″, I use a couple of shims and pre-drill my hole. Then I drive a 2-1/2″ long drywall screw through both the shims and the brace until snug. I make sure to use a finish washer for both a better look and it also prevents the screw from digging into the brace.
Once the screw is tight, I’ll score the shims with a box cutter and just snap them off.
The uppers will install the same way, except their back braces are exposed and painted.
The brace that spans the top of the cabinet is for attaching the countertop. I can just drive a couple screws from below and the counter will be snug.
Office Countertops
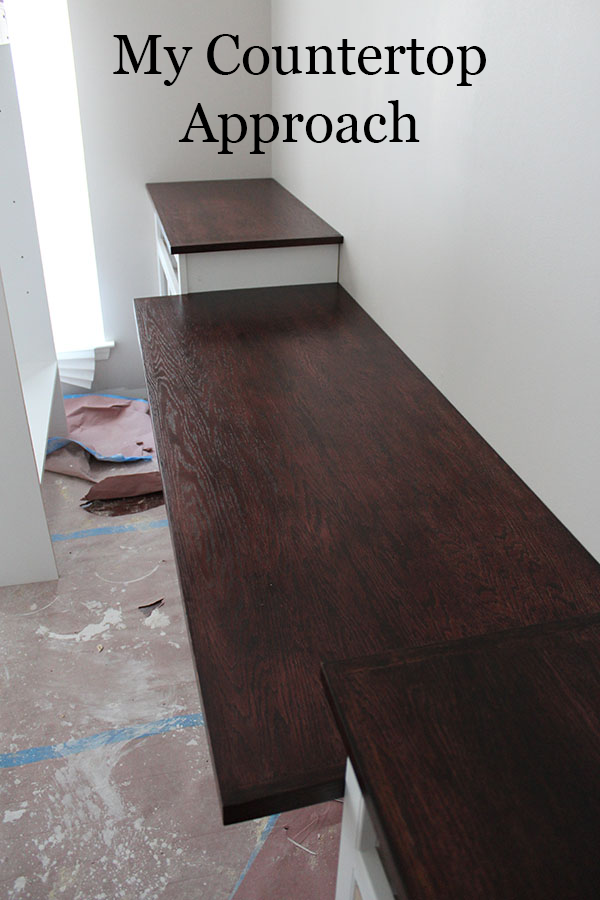
Now for the counters. I used 3/4″ thick oak plywood and the edges are wrapped with oak hardwood to hide the plywood edge. Since the walls aren’t perfectly square, I used a technique that granite installers often employ. I took some cardboard strips (granite guys use luan, which is stiffer) and hot glued them to trace out the footprint of the tops. I then dropped the cardboard outlines onto the plywood sheet and just cut along the lines. After the plywood parts were cut out, I used a brad nailer and some wood glue to attach the oak strips to the plywood.
Our home office also features a center desk section. This is just a large piece of plywood with the same edge banding. Since it’s not sitting on top of a cabinet, it’s actually lower than the built-in counters, it needs to be supported in a different manner. In this case, I’ve attached a few strips of oak hardwood to the cabinets and the wall it butts up against. In the front, to reduce flexing, I’ve screwed in a piece of angle iron that rests on the oak strips. It’s also screwed into the plywood from below.
Here’s a shot of the completed counters.
It took me a few days to get that deep, rich color. Here’s how I did it.
I used three different stain colors. I started out with Varathane’s Black Cherry. I applied it with a sponge applicator and let it set it overnight. I never wiped it off at any point. In fact, I never wiped off any of the stains. Next up I applied a coat of Minwax’s Cherry stain. After letting that set all day, I finished with a coat of Minwax Red Oak. After around 12 hours of drying time, I sprayed on three coats of satin polyurethane using a regular spray can. In between coats of poly, I sanded with 600 grit sandpaper.
I went with the three different stains method to get a more complex look. I’ve never liked the results I get from applying one color and then wiping. I also much prefer spraying on the poly as opposed to brushing or sponging it on since the sponge tends to drag the stain around with it. If you spray the poly, it just layers on without causing much of a mess. Although you do have to watch out for overspray.
So, that’s a sneak peek of our office counters. If you’re interested in the latest photos, you can check them out on our Instagram account.
Any questions?